Windows 11 Keyboard Not Working: Full Guide
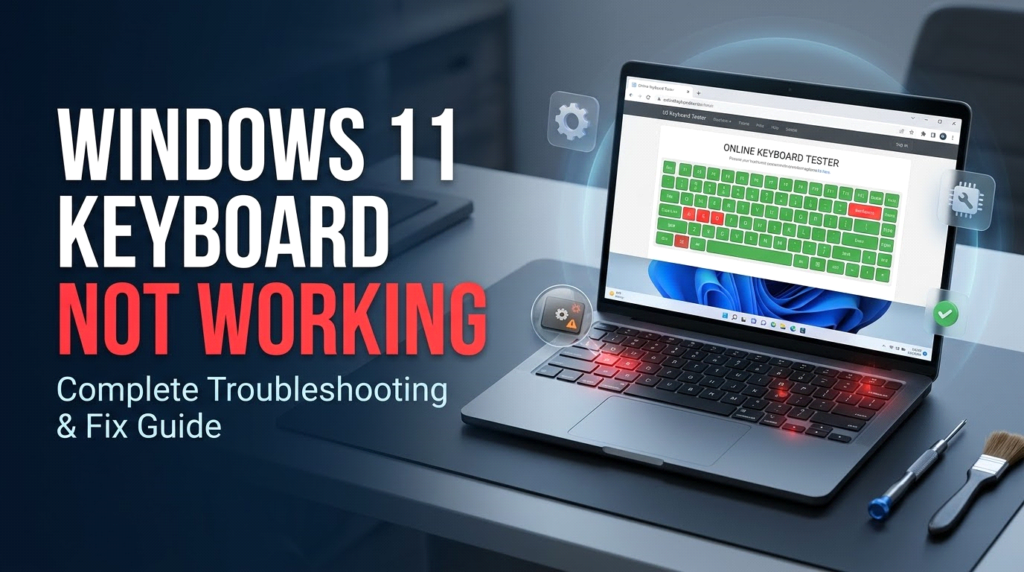
Many Windows 11 users quickly assume that the built-in keyboard module is defective and has to be replaced with a new hardware component when the Windows 11 keyboard is not working. Unresponsive PC keyboard keys are typically caused by a small driver conflict, problems with power management, dust particles getting into mechanical switches, or even interference from third-party applications.
We’ll go over an effective method for fixing “keyboard not typing in Windows 11” in this post. Additionally, we’ll show you how to use an online keyboard tester for macOS, Windows 11/10/8/7, tablets, and smartphones to determine which keys on your device are functional and which are not.
Knowing Why the Laptop Keyboard Is Not Working in Windows 11
Contemporary laptop keyboards are intricate systems made up of firmware and hardware parts that are managed by drivers. Before attempting to fix keys, it is crucial to comprehend how they operate.
To register a key in an operating system, it must be pressed. A keycap presses down on a mechanical switch or membrane throughout the procedure. The latter sends a signal to the Embedded Controller (EC) by short-circuiting a contact on a flexible circuit beneath the keyboard plate using a scissor mechanism.
After the EC transforms the interrupt signal into a scan code, Windows 11 drivers process it and display the appropriate character on the screen.
Keypresses do not register if any link in this chain breaks:
- Physical Obstruction: Dust particles, food crumbs, or hair can obstruct the hardware matrix and prevent the key from fully actuating.
- OS and Input Driver Conflicts: The Windows kernel contains driver files that are out-of-date, corrupted, or mismatched.
- Accessibility Feature Interference: System features such as Filter Keys or Sticky Keys can inadvertently swallow keystrokes.
- Third-Party Software Hooks: Background programmes that intercept important inputs, such as gaming overlays, macro binders, and screen recorders.
Step 1: Use an Online Keyboard Tester to Identify Hardware Versus Software Issues
You need to ascertain whether the problem is caused by a broken physical key switch or a software configuration flaw before disassembling your laptop or spending money at a repair shop.
Using the Keyboard Tester to perform a real-time, browser-based diagnostic test is the quickest and most dependable approach to confirm key actuation.
How the Diagnostic Test Is Performed
- Launch the Keyboard Tester by opening your web browser (Chrome, Edge, Firefox, or Safari).
- The screen will display an interactive visual keyboard layout that depicts common laptop and desktop key matrices.
- One by one, press each key on your actual keyboard, paying particular attention to switches that are giving you trouble.
- Observe the real-time reaction of the virtual keyboard on the screen:
- If the key appears on the screen, the keyboard matrix ribbon and actual key switch are operating as intended! On Windows 11, background software, application key bindings, or OS keyboard layout configurations are the root of the problem.
- The signal is not getting to the browser level if the key doesn’t light up completely. This could be a dead mechanical switch membrane, a loose keyboard ribbon cable, or actual material obstructing the switch connections.
Step 2: Resolve Windows 11 Software and Driver Issues
Try these tried-and-true operating system remedies if your browser test verifies that the physical key signal reaches hardware layers but fails inside particular software programmes.
Fix 1: In Windows 11 Settings, Turn Off Sticky and Filter Keys
In order to help users with hand tremors, Windows 11 has an accessibility function called Filter Keys that instructs the OS to disregard short or repeated keypresses. It can cause keys to seem utterly dead or sluggish if it is unintentionally activated (usually by holding down the right Shift key for eight seconds).
- To access Settings, press Win + I.
- Go to Accessibility from the sidebar on the left.
- Choose Keyboard by scrolling down under the Interaction section.
- Find Sticky Keys and Filter Keys, then turn both switches off.
- To check for immediate responsiveness, retest your keys with the Keyboard Tester.
Fix 2: Use Device Manager to Reinstall Keyboard Drivers
Key scan codes may not correctly reach the Windows 11 kernel due to corrupted or out-of-date driver files. Windows is forced to reset input communication channels when a clean driver reinstallation is performed.
- Choose Device Manager by right-clicking the Start button or by pressing Win + X.
- Expand the Keyboards section by scrolling down.
- Choose Uninstall device by right-clicking your laptop keyboard entry (such as Standard PS/2 Keyboard or HID Keyboard Device).
- Click Uninstall to confirm the prompt.
- Your physical keyboard will momentarily stop working, but don’t panic.
- To restart your laptop, use your mouse or touchpad (Start > Power > Restart).
- Windows 11 will automatically identify your built-in hardware and install a brand-new keyboard driver when you restart the computer.
Fix 3: Use the Windows 11 Keyboard Troubleshooter
To identify hidden system service conflicts that impact human interface devices (HID), Windows 11 comes with specialised diagnostic scripts.
- Press Win + I to open Settings.
- Choose Troubleshoot by scrolling down while remaining on the System tab.
- Select “Other troubleshooters.”
- Click Run after finding Keyboard in the list of diagnostic tools.
- Give Windows permission to check for problems between background services and follow any prompts for automated fixes.
Fix 4: Look for Mismatches in Regional Keyboard Layout
Sometimes, because your OS keyboard layout is different from your physical key layout, keys do not produce the anticipated character (for example, hitting @ prints %).
- Go to Settings > Time & language > Language & region.
- Make sure the language you want (such as English (United States) or English (India)) corresponds with the keyboard you are using.
- Choose Language options by clicking the three dots next to your preferred language.
- Make sure the right physical layout (like QWERTY) is indicated under Keyboards.
Step 3: Resolve Dirt and Hardware Obstacles
Physical barriers or problems with contact alignment are probably to blame if the online keyboard tester tool displayed zero response for particular keys across all applications.
Fix 1: Use Compressed Air and Isopropyl Alcohol to Clean Under the Keycaps
Skin oil, hair, dust, and food particles accumulate behind laptop keycaps after months of constant use. The rubber dome contact cannot physically make contact with the lower circuit plate because of this debris.
- Power Down Safely: Unplug the power charging cable and turn off your laptop entirely.
- Angle the Chassis: Over a spotless table, tilt your laptop forward at a 45-degree angle or hold it upside down.
- Use Compressed Air: Use a compressed air can with a narrow straw nozzle to blow away debris. To release trapped lint, spray short, deliberate bursts underneath and around the borders of unresponsive keys.
- Clean Contacts (Optional): Use a cotton swab to apply a single drop of high-purity (99%) isopropyl alcohol to the switch edges if a key switch is still sticky because of dried liquid. Before restarting the system, give it ten minutes to fully dry.
- Use the Keyboard Tester to retest key actuation.
Fix 2: Emergency Reaction to Spills and Liquid Exposure
Your keyboard may stop functioning or register phantom double taps if you recently spilt coffee, soda, or water on it. This is because liquid residue can bridge circuit traces.
- Take Quick Action: To quickly shut off your laptop, press and hold the power button. Don’t wait for Windows to shut down normally.
- Disconnect Power: Take out USB drives, Wi-Fi dongles, and external power cables right away.
- Turn the Laptop Upside Down (Tent Mode): Place your laptop upside down in a V-shape on a dry cloth after fully opening the display screen (“tent mode”). This stops fluids from penetrating the motherboard further.
- Dry Completely: For at least 24 to 48 hours, keep the laptop inverted in a room that is warm and well-ventilated. Avoid using a hot hairdryer since it can warp rubber dome switches and delicate plastic keycaps.
When Should the Laptop Keyboard Be Replaced?
The problem indicates an internal hardware failure if you have completed all of the troubleshooting steps listed above, including disabling accessibility hooks, reinstalling drivers, cleaning physical keycaps, and confirming zero response on the Keyboard Tester.
Permanent hardware failure frequently occurs for the following reasons:
- Frayed Matrix Ribbon Cable: The flex cable that attaches the keyboard assembly to the ZIF socket on the motherboard has broken or come free.
- Burned Circuit Traces: Conductive silver traces are broken by short circuits caused by previous liquid spills.
- Worn Membrane Springs: The inner silicone rubber dome switch physically bursts.
Your productivity will be permanently restored in these situations if you replace the internal keyboard module or use an external USB/Bluetooth keyboard.
In Conclusion: Diagnose First, Then Fix
On Windows 11, handling sluggish laptop keys doesn’t have to be costly or annoying. You may rapidly determine if you are dealing with a simple software bug or a physical switch issue by following a logical procedure, which begins with a free, instant browser test utilising an online keyboard tester tool for Windows 11, 10, 8, 7, Mac, and iPads.
Common Questions (FAQ)
You can test key actuation at the browser level by using an online keyboard tester tool for Windows 11, 10, Mac, or iPad. The hardware is operational, and there is probably a software bug if the key illuminates on the virtual matrix. A hardware switch or physical ribbon failure is indicated if it doesn’t register at all.
If Updating the Keyboard Driver on Windows 11 Does Not Work, What Should I Do?
Try restarting your laptop after removing the keyboard device from Device Manager. At launch, Windows 11 will automatically install a new generic driver. Additionally, look for actual debris underneath the keycap.
Is It Safe to Use Compressed Air to Clean Beneath Laptop Keycaps?
Indeed. To remove dust, breadcrumbs, or lint from under the key switch membrane without harming the fragile mechanical scissor hinges, hold the pressurised air can at a 45-degree angle.
How to Fix Printer Offline: Complete Guide
What Motherboard do I have? Find out Now

Exploring the Steam Deck GPU: Performance and Graphics Card Equivalent
About Author
